CW Part 3

I thought I would post another in my series about learning CW. You can go back and find my previous two posts if you would like to catch up.

I wrote in July this year that I had made a single CW contact this year, which was a big mess. Since then I have have completed the CW Ops Academy Level 2 course. I have to say that this course helped me a great deal. For those not familiar with CW Ops Academy, more information can be found on their web site. Their courses are highly regarded and are very good. The goal for our class was to be pretty solid at about 15 wpm receiving and sending. I didn’t quite hit that goal, but I did improve a great deal comparing my ability before and after the course. I probably was not as prepared for the class as some of my classmates were. Also starting a new job, my practice time was interrupted a bit as well.

Since then, I have logged about 40 CW contacts. I am not able to spend a lot of time operating and squeeze time in here and there. Most have been quick, QSO party type contacts. A few have been short contacts trading signal reports, name etc. I have yet to get brave enough to try a slow rag chew, but will someday soon.

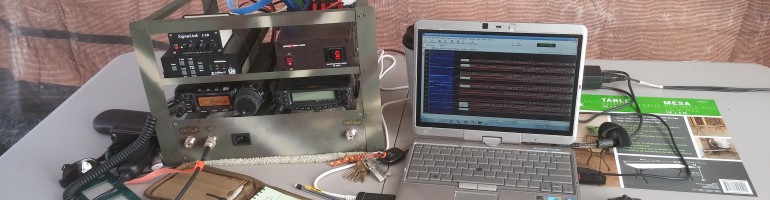
The highlight of my short CW operating career was making a CW contact with VP6R on 15 meters. This was the Pitcairn Island DXpedition. I tried making a contact via SSB phone and grew frustrated as I was unable to succeed with my small station of 100 watts and a wire antenna. I decided to try CW and found them operating on 15 meters one afternoon and start listening. I understood the exchange, figured out the split operation, and waited for a lull in the pileup. When VP6R called CQ, I transmitted my callsign and heard them respond with my call and we completed the exchange! It showed up in Clublog a day or so later. I experienced the ability of CW getting through where I could not with SSB phone.

If you are thinking about learning CW or just beginning, I want to say it’s possible and you should be able to learn it. I seem to be learning a bit slower than some people, but I am making steady progress. I am using several tools in addition to the CW Ops Academy materials. My favorite resources, but not a complete list be far, have been:

  • CW Ops Academy Classes (I & II). I am not ready for Level III yet. The courses are free and well worth the time and effort.
  • K7QO Code course. I have copied all the files to my phone and can play them in my car when I don’t have passengers.
  • https://lcwo.net/ Free online lessons and exercises.

There are many other resources for learning CW. There are a lot of phone applications for both Android and iPhone, many other websites and programs you can download and install on your local computer. Those listed above were just three that I use the most.

Good luck learning CW & 73!

Leave a comment

Filed under Uncategorized

CW Part 2

In 2016, I posted that I was learning CW by taking the CW Ops level 1 course. I did complete the class, made two on air QSO’s then life got in the way of the ham radio hobby and until recently, I left CW alone. In January this year, I decided to get started again and set a goal to make 100 CW QSO’s by the end of the year.

I started reviewing the CW Ops materials I had from 2016. I also copied the all the K7QO code course mp3 files to my phone so I could listen to that while in the car. In addition to those two things, I am also trying to listen to live QSO’s on the radio. Most of them go too fast for me to not miss a bunch of characters. Some QSO’s are difficult due to timing or no spacing. I heard a CQ call that sounded like “CQCQdeCallSignk”. There were no spaces in between the characters or words. One long string of dits and dahs.

So far, I am making progress. I relearned the alphabet, numbers and a few punctuation marks, and am trying to gain faster recognition so I can understand more.

I did make my first CW QSO of the year last week. It was a bit of a mess but we managed to actually exchange enough info to make an official QSO! That lead to an exchange of emails and this fellow ham and I made another scheduled QSO and he’s going to help me make more so I can practice CW! Gotta love the ham radio community!

If anyone is thinking of trying to learn CW, do it! If I can do it, then I think most people could do it as well. It’s going to take some effort and time but what doesn’t? 73.

3 Comments

Filed under Uncategorized

K5A Special Event Station

Screenshot from 2018-08-10 08-40-25

On Saturday, August 11, 2018, the Bella Vista Radio Club will be operating a special event station at the Shiloh Museum of Ozark History in Springdale Arkansas. This is to celebrate the 50th year anniversary of the museum. We will be operating on the museum grounds from the General Store. Listen for us on the air starting Aug 11, at 1300Z. Operations will conclude at 2300Z.  Two stations, one SSB and the other CW, will be operating on or near 14.250, 14.035, 7.250 and 7.035.

I will be participating part of the day, likely on the SSB station. I may spend some time trying to listen to CW to see if I can decode it yet! Gotta work on that!

For more information see the following links:
ARRL Link
Bella Vista Radio Club Link

Looking forward to having a QSO with you on Saturday!


Leave a comment

Filed under Uncategorized

DMR Hotspot

There is a lot of blogs, forums and place to get information about various aspects of our hobby. Ham Radio, as you all know, is a diverse hobby with a lot of different ways to  enjoy it. This post is going to be about my learning and stepping in DMR. As with most of my posts, this is aimed at someone just looking at and thinking about diving into DMR. If you are a seasoned DMR operator, then you likely know all this already.

A friend of mine brought an inexpensive TYT MD-380 DMR radio to a club meeting and told us about DMR. He uses it a lot when he travels around a two state are for his job and loves it. After that, I decided to order the same radio and see what DMR was all about.  This friend sent me his code plug and when I looked at it I was lost. He had all the repeaters for two states, lots of talk groups and lots of operator call signs. It was a lot to digest for someone who didn’t know how to program a DMR radio.

I decided to take a step back and learn some more about how DMR works and how to do the programming. I wanted to start simple and begin my code plug from scratch. The closest DMR repeater to my house is about 20 miles away and with all the hills around Arkansas, I cannot hear it with the HT antenna. I figured putting together my own hotspot would be the ticket as I have three Raspberry Pi’s sitting around doing nothing but collecting dust, so acting on some advice from more experienced hams, I ordered a DVMega board to go with one of the Pi’s.

I asked a friend with a 3D printer to print this case for the Pi and DVMega from Thingiverse.

IMG_0246

The completed Pi, DVMega combination put together and ready to go. Yes there are two screws missing. I don’t know that I need them so I left them out.

For storage for the Pi, I used a Sandisk class 10 32GB micro SD card that I already had. It is important to use a decent storage card so the performance isn’t worse than it needs to be. One of these cards is less than $15, so it is not very expensive compared to the cost of the entire hotspot project.

One could download Raspian and install all the software separately but there is an image already created that is very popular called Pi-Star. It is essentially Raspian with MMDVMHost, DStarRepeater and other software included. It is an easy way to get everything you need for DMR, DStar, P25 and more digital voice modes.

Pi-Star can be downloaded from here. Once the image was downloaded, I used the Linux dd command to write the image to the card.

After inserting the card into the Pi and booting it up, there are two very important steps. The first is to expand the image to use the entire card. When first written, a small portion of the space is used and a command needs to be run to expand the file system to use the rest of the space. That command is pistar-expand. The second important thing to do is to make sure the image is updated. The Pi-Star creators provide two commands for doing that. pistar-update / pistar-upgrade which are similar to the Raspian apt-get-update and apt-get upgrade commands but do so for the operating system and the software included in pi-star.

To setup the Pi-Star software, I followed along with this page:

https://www.toshen.com/ke0fhs/pi-star.htm

There is a lot of information on this site in addition to this page related to DMR. It was worth browsing around and finding information that I didn’t know.

After configuring the hotspot, I was able to verify that it connected to the BrandMeister Network.

The next step was to program the TYT MD-380. I had to choose a simplex 70cm frequency. After consulting the band plans and looking at the Arkansas repeater council page, I was able to choose one to use.

I won’t go into a lot of detail on programming the radio as there are a lot of YouTube videos and web pages describing that process.

I listen to the Hamradio 360 Workbench podcast and they use a talk group that I programmed into a channel and was able to hear some of that traffic. I also made a call and confirmed that I was able to transmit on the talk group as well as receive.

My next step is to find other talk groups that I might want to listen to, and determine how I will use DMR going forward. I am planning on taking the hotspot on business trips and possibly use it in the car for DMR mobile. I’ll figure that out as I go along.

Overall the process was not difficult, but took some time researching how DMR worked so I could understand the programming better. I used many web resources along with several YouTube videos. I still have a few more bookmarked to watch but I am getting a handle on it.

Edit: As I learn more about DMR and gain experience, I’ll probably post again on the subject in the near future.

Comments and questions are welcome.

2 Comments

Filed under Uncategorized

Portable Station Build – Part 3

I am sitting here watching the NFL playoffs and remembered that I never posted my final post about my portable station build. I completed the build last year. I say completed, but of course that does not rule out future modifications. I am a ham after all right? 

The major change from the last post to this one is the addition of a front panel on the lower portion that allowed me to add connectors for power and antennas easily in the front of the box. 

There are two antenna connectors on the left for the FT-857D, one for HF and the other for VHF/UHF. The HF jumper actually is connected to the antenna tuner and there is another jumper goes to the radio. There is also a VHF/UHF connection on the right for the FT-8800R. The power connector I salvaged from a computer power supply and made a power cable that plugs into the Powerwerx power supply. 

The last picture is the setup in action at Field Day. I was running PSK31 with my club on 20m and had a good time. You can see that the radio on the left is running and there is no power connector in the front. In this picture, I have a 35 amp/hour battery under the table feeding power into the RigRunner mounted in the back of the rack. I was able to run low power digital modes all day and into the night. I still had power left over when I went home.  

I have been happy with the rack that I built. Lately I have thought about splitting the radios apart into their own rack as I have found that I don’t use both at once usually. There are also events where I need just the FT-8800R and don’t need the HF gear. Having the FT-857D along for the ride does give me a spare radio if something were to malfunction with the FT-8800 during an event I suppose. So for now, this is the result. 

K5UNX

Leave a comment

Filed under Uncategorized

CW Filter for my FT-857D

Last year I decided that I wanted to learn and use CW. To that end, I enrolled and completed the CW Academy Level 1 class with the CW Ops group (http://www.cwops.org/cwacademy.html). I have 2 CW QSO’s under my belt and I need to get on the air and make some more. Ion preparation for that, I decided to get the 500Hz CW Filter to add to my FT-857D. The radio has two slots for optional filters. Looking online, it seems the filters for the FT-857D are getting harder to find. I found one on INRAD’s web site and ordered one. It came a few days later and sat on my desk for a couple days. being Saturday and getting some things done, I decided to install it. I found it’s really very easy to install this filter.

To start with, there are 7 screws that hold on the top cover of the radio. 2 on each side and 3 on the top. The labels are simply my way of remember where things go in the back of the radio while it’s in my portable rack.

After removing the cover the locations for the filters are in the back left corner, as shown in the lower left portion of the photo below.

An up close look.

The filter is pretty easy to orient. There are 3 pins on one and and 4 on the other so it’s hard to get it backwards. There was also a reminder from INRAD that the circuit board went down and the label faces up. Here is after the installation which is simply pressed in.

After the installation, I wanted to make sure it was recognized by the radio so I powered it in and looked at the filter menu option and the 500Hz filter showed up as option B.

Now all I have to do is get on the air! When I do that, I will try to remember to make a video demonstrating how the filter affects reception of CW signals.

If you have a FT-857(D) and would like a CW filter for it, you might put this project on your list. I can imagine a day when these filters are really hard to find!

73!
K5UNX

2 Comments

Filed under Uncategorized

CQRLog CAT control for FT-857D

My last post, I talked about getting Linux setup for my new ham laptop. This is a short post to cover another small step in that process.

Tonight I was working on getting Rig Control working for my FT-857D and CQRLog on Linux. A lot of times, when I read posts like this, or watch youtube videos, people ignore the hardware side and just focus on the software side of things. I am going to try and cover both.

The hardware setup is simple. I am using the programing cable (CT-62B cable) that came with my RT Systems software to connect the CAT port of the FT-857D to a USB port on the laptop.  Windows will see this cable a COM port, in my case, COM3 when I booted to Windows.

I found I had to install a couple things in Linux in order to get this working properly. When I intalled CQRLog, hamlib was installed along with it. I also had to install a package called libftdi1. When I look at the output of “dmesg” I see that the CT-62B cable shows up as ttyUSB0 which is the name of the serial port in Linux that I am going to use to communicate with the radio.

In CQRLog I set the following:

  • RIG Model = 122 FT-857
  • Device = /dev/ttyUSB0
  • Serial Speed = 9600 (This is what the radio is set to) (*Changed to 9600)
  • Check the box for “Run rigctld when program starts”

Everything else on the TRX control setup in CQRLog is set as default and not changed from the installed values.

One last Linux setting, in the /etc/group file, I had to add my user name to the “dialout” group. This can be done with the command usermod from a terminal. In openSUSE which is what I am running, I ran the command “usermod -G dialout k5unx”. I then logged out and back in and started up CRLog. When I opened the TRX control window the frequency matched what was one the radio and when I spun the radio dial, CQRLog changed with it.

More to come as I get up and running with Linux on my ham radio laptop.

Leave a comment

Filed under Uncategorized

New Shack PC – Linux

The last few years, I have been using an old hand me down laptop for my ham radio activities. The old one had little memory, the battery that didn’t last very long, was starting to boot unreliably, even after a Windows reinstall, and a few other issues. So I bought an open box Dell laptop at a discount from a local retailer. It has 8GB of RAM and a 1 TB disk drive and i5 processor. While it’s not a top of the line laptop, it’ll work for what I have intended. Also the screen isn’t the highest resolution but since it’s dedicated to ham radio usage only it won’t be a problem.

My main goal with this project is to use Linux more for my ham radio activities. I now work professionally in the Linux world so I would like to carry that experience into my ham radio hobby. I am setting this up as a dual boot system, keeping Windows 10 that came on it, and then installing OpenSUSE Leap 42.2 as my Linux distribution. I know Ubuntu seems to be the most popular distribution, but I am most familiar with SUSE Enterprise Linux, so OpenSUSE draws on that experience. I run openSUSE 42.2 on my work laptop on a daily basis so I am very familiar with it.

I thought I would post about the steps I am taking to achieve this so if anyone else decides to do something similar, I will have shared what I went through. I will try to follow this up later with posts about using various Linux applications for ham radio like CQRLog, WSJT-X and other things I find useful.

I will use the Windows install for a few things. My old ham radio laptop was running Windows so I can duplicate it’s capabilities if needed. One of those jobs is some Windows software that I bought from RT Systems for programming my radios. I’ll eventually investigate Linux alternatives such as Chirp but that will be low on the priority list.

The first steps I took in the process are:

  • Boot into BIOS/uefi and disable Secure Boot. I don’t need this.
  • Boot up Windows, create user account, and fully make sure all updates are installed, and any initial setup.
  • Make a Windows 10 recovery USB thumb drive. This is built into Windows 10.
  • Download the restore image from Dell to restore the laptop if needed.
  • Run the Windows Disk Cleanup utility to remove all unneeded files including any previous version of Windows left behind after the updates, and all update related files. I check all the boxes in the cleanup utility including system files.
  • Defragment the C: drive. This is needed so I can shrink the C: partition
  • Use diskmgmt.msc to shrink the main Windows 10 partition to about 450GB. That will leave about 430GB of free space to use for Linux installation. I had to disable system protection, pagefile and hibernation in order to get the drive to shrink to where I wanted it. These are unmovable files and might hamper the  ability to shrink the disk. After shrinking, I reenabled all of those.
  • VERY IMPORTANT STEP: Use Clonezilla to make a complete cloned backup of the entire disk drive so I can put Humpty back together if something bad happens or I make a mistake. This will backup all the partitions to a set of files on a USB drive, and allow me to completely restore the drive and partitions.  I now have 3 ways to restore the system. Clonezilla backup, restore image I downloaded, and the Windows Recovery thumb drive I created.
  • Install Dropbox as I’ll use that to transfer some things from the old laptop to the new one.

BACKUPS are very IMPORTANT as is the ability to UNDO something even if it means a full restore. NOTE: Clonezilla doesn’t backup empty space to the resulting backup is smaller that the drive that’s being cloned.

Now it’s time to install Linux. I made a bootable thumb drive from the openSUSE Leap 42.2 iso. This was done using dd on my work Linux laptop. The website to download openSUSE from is: http://www.opensuse.org.  There are two openSUSE distributions. Leap is a point release and Tumbleweed is a rolling release and always at the bleeding edge. If you want something stable then Leap is the way to go. It’s also what I run on my work laptop as my primary OS.

I booted from the Leap thumb drive, and went through a normal install. From the free space I created by shrinking the Windows partition, I made a 4GB swap partition, a 50GB / (root) partition and assigned the rest of the space to /home which is where all my data will reside.

When Linux is installed, it installs the Grub2 bootloader which is able to detect Windows 10 and make it a selection at boot time. When you boot the system, a Grub2 menu will display allowing the choice of which operating system to boot. You can also choose which one boots as default when the grub2 timer expires.

One thing I found . . . When I booted back into Windows, it assigned drive letters to the Linux partitions which is something I did not want. I started up diskmgmt.msc in Windows and removed the drive letter associations from the 3 Linux partitions. That way Windows won’t mount the Linux partitions and possibly cause an issue.

At this point, I have a dual boot system and am ready to go. So far on the Linux side I have installed the following:

  • Terminator – A nice terminal program
  • cqrlog & mysql – Popular Linux Ham Radio Logging program. I exported my log from HRD (ver 5.24) on the old computer and imported it into cqrlog.
  • tqsl – I made a backup of my certificate using tqsl on the old Windows computer and was able to restore it using tqsl on the new Linux installation.

One last thing before moving on. I took another Clonezilla backup of the entire laptop drive. Now I have two Clonezilla backups and could restore either one if I desired. 

Just a note on Virtual Machine vs Dual boot. I use VM’s daily on my work laptop and my other personal laptop so I am very accustomed to their use. On my work laptop I run Linux full time with Windows 10 in a virtual machine along with about 10 other Linux VM’s (not all running at once). For the ham laptop I wanted two things. To run Linux as full time as possible for my ham radio hobby, and for the operating system to have direct access to the hardware without the virtualization layer in the middle.

More to come!

9 Comments

Filed under Uncategorized

NPOTA – First Pile Up

NPOTA as most reading this will know by now, stands for National Park On The Air. It is an ARRl year long event helping the National Park Service celebrate their 100th anniversary. It operates a lot like SOTA in that there are activators and chasers. I was able to participate last Saturday as an activator when I visited some other hams that had setup at the Pea Ridge National Military Park for an activation.

IMG_0082

The battle at Pea Ridge was a pivotal Civil War battle that took place March 7-8 1862. The battlefield was spread across 4,300 acres where 26,000 soldiers fought. Today it is still one of the most intact remaining battlefields from the Civil War left in the United States. If you are a history buff and would like more information about the park, you can visit the nps.gov website.  Here is the wikipedia page about the battle.

IMG_0080

The radio setup consisted of a Yaseu FT-450, a Carolina Windom antenna, and laptop all being powered by a small generator. The team made over 400 contacts for the day. We worked stations fairly constantly most of the day.

I watched the operators for a little while, then jumped in to log for the operator working the radio. After a while they asked me to take the microphone. This was my fist time on the receiving end of a pile up. Someone had spotted us and there were a lot of people all at once trying to contact us. I got flustered and made a lot of mistakes. After a bit, I turned the microphone over to Don, K5DB who was a lot more experienced at working this style of operation. He has been doing NPOTA all year. I went back to login but watching and listening to Don work the pileup, trying to learn. After a while I got back on the mic and tried again. I simply tried to emulate what Don did. I actually was better at it the second time. When I called QRZ or CQ, I would write down 2-4 partial callsigns or even a complete call, as I was able. Then I worked down that small list, calling for the partials. Don got it across to me that I needed to control the pileup. Ask for specific partials, ignore the ones that don’t match that are just trying to barge their way in. I was in charge! I say that not as a control freak but as someone who learned a lot this weekend, working his first pileup.

A few tips for anyone who tackles a NPOTA pileup for the first time. The more experienced ops already know this!

  1. It’s not a real contest, it’s NPOTA. So relax!
  2. If you have someone logging for you, you should have paper & pencil for notes, partial callsigns as you operate. I can’t speak to doing this by yourself as I have not done that yet.
  3. Call the stations you hear, calling back partials as needed.
  4. Don’t let bully stations barge in when you are calling a specific station. Ignore them.
  5. Maintain control of the pileup! You are the boss for the moment.
  6. You can only work one station at a time. You will get to most of them in time.
  7. You will make mistakes the first time, just deal with it a move on.
  8. Relax! it’s not a real contest!

I definitely need to get out and operate more in this the of situation.

73 and good luck!

Leave a comment

Filed under Uncategorized

Backup Your Shack PC

We recently passed World Backup Day on March 31st. These days there seems to be a day for everything, important or not. Backing up your computer data is more important than a lot of people think. I don’t know how many times someone has brought me their computer asking for help when they can’t access something on it. My first question is usually “Do you have a backup?”  And the response is more often than not “No! That’s why I need help”. Occasionally I am able to save their data but if their disk drive is too far gone, then it’s lost.

Consider what’s on your computer. I have years and years of digital photos, purchased music files, and a lot of important documents. That doesn’t even begin to cover my ham radio related data. The important things as far as I am concerned that I would rather not lose are my logs, LOTW TQSL certificate files, data files for programming my radios and other data files like antenna plans and such.

Ask yourself this question . . . “Can I get all that stuff back if something terrible happens to my computer and the data is no longer accessible?”

You should be able to answer “Yes, I can!”

I am not going to go into all the possible ways to backup your data. There are USB drives, thumb drives, online services or you can build a home backup server. This article isn’t going to review all those possibilities and I am sure there is some method I left out of this short list.

Consider the 3-2-1 backup rule.  The 3-2-1 strategy means having at least 3 copies of your data, 2 of which are on different mediums (i.e.: devices) and at least 1 copy off site. The key to this, is that all 3 copies need to be reasonably up to date. Having the offsite copy too old doesn’t do much good if that’s the one you need to use for a restore.

For my home computers, I use a network drive and an online service. So I have my original copy, my onsite network drive copy, and the offsite online service as my third copy.  You don’t have to use an online service. I just like the automatic online, offsite backup.

Another important thing to consider, is the restore itself. Your backup is only as good as your ability to restore it. Occasionally restoring a specific file is a nice test. Backing things up in some super-duper format isn’t any good if it’s too difficult to restore.  Also think about how you would restore the operating system and not just your data. You likely don’t need to backup the operating system as most people have restore disks that shipped with their computer or some other install method for the OS.

So, please think about what and how you backup your data. Can you restore it? Do you have an offsite copy? What if I lose my main hard rive and it’s contents?

While those are not nice thoughts, it’s better to be prepared than not . . . . And it seems like a lot of the Ham Radio hobby/service is about being prepared in one form or another.

Leave a comment

Filed under Uncategorized